Table of Contents
Introduction
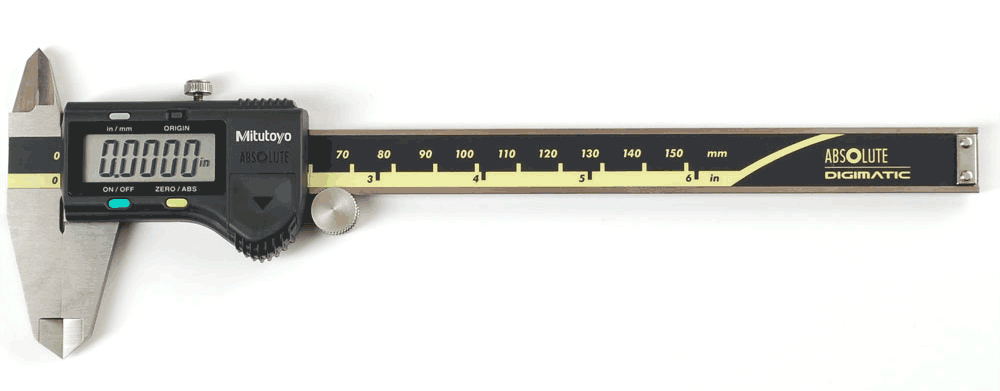
This tutorial is for the Mitutoyo digital calipers we carry in the Adafruit shop. They're the best calipers one can get and we're pleased to offer them. We've put together a basic usage guide here to help people get started.
Digital vs. Dial Calipers
There are a few different types of caliper you'll come across: digital, dial and vernier. We're going to skip vernier and show the difference between dial and digital.
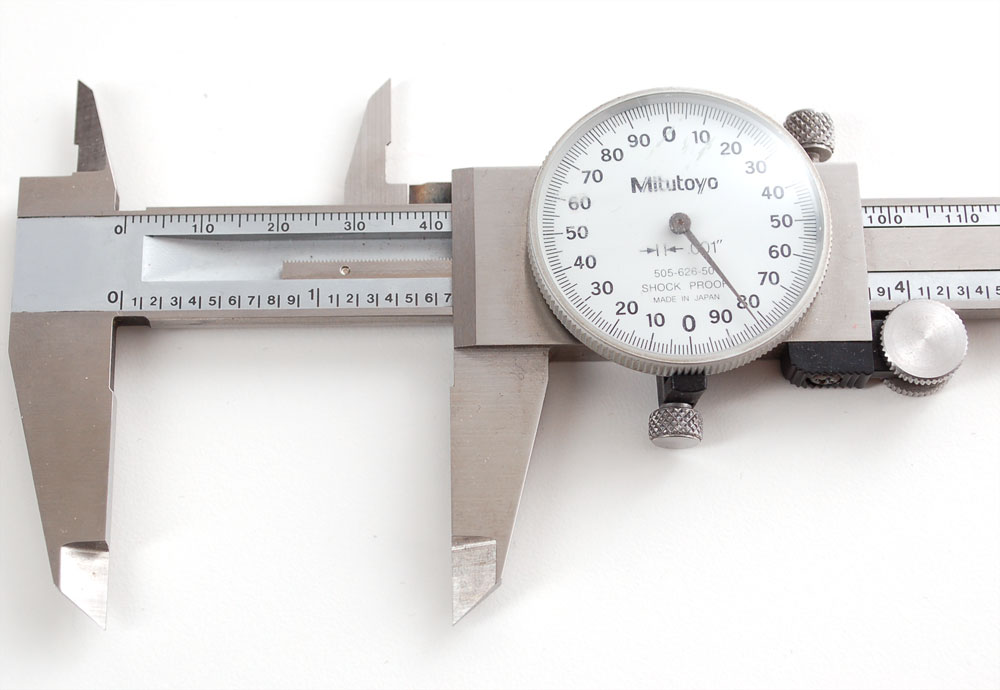
Dial calipers use a mechanical system consisting of a rack and pinion, there's a gear-set inside as well that moves the dial in increments of one thousandth of an inch (or hundredth of a mm). To read, the 'most significant' value is read from the rule and the fractional value from the dial. The nice thing about dial calipers is that they don't use batteries and although are not waterproof, work well even if damp.
There are some downsides: if they are dropped, the rack and pinion can get out of alignment (especially on cheaper calipers) and it can be difficult to recalibrate. They're a little tougher to read and often are either imperial or metric (but not both).

Digital calipers don't have any rack/pinion/gear system. This makes them more shock-proof which we like (since we're a little clumsy and have dropped the calipers a few times).
Digital calipers can also easily convert from inches to mm and back which we really like since a lot of electronics is mixed-units
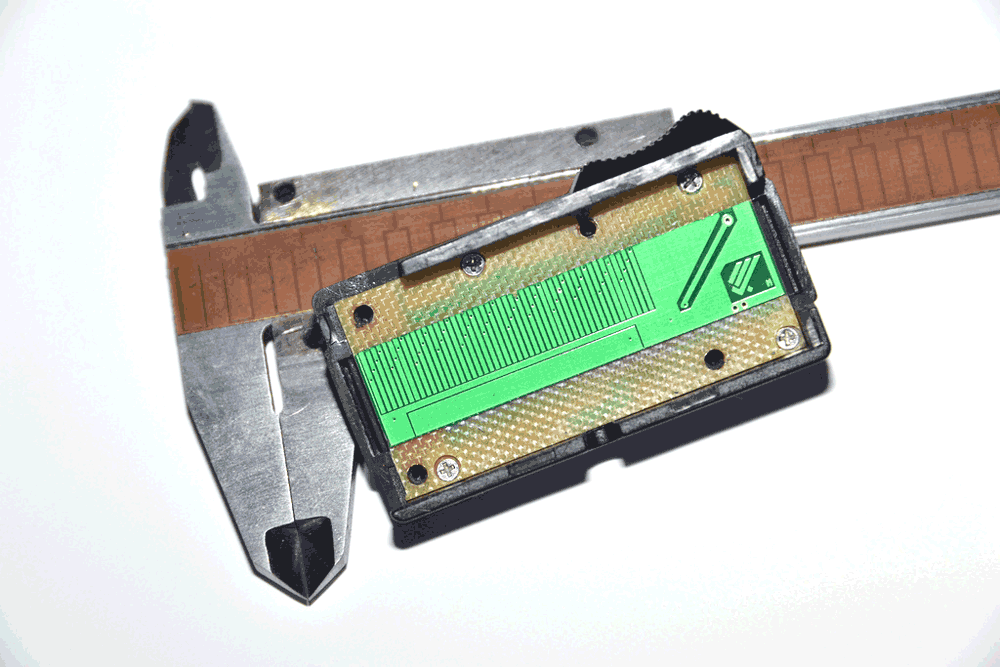
So how does a digital caliper work without gears? it turns out that underneath the plastic 'ruler' overlay is an engraved copper design. The slide part has a circuit board with thin strips that look like a 'comb'. The comb and copper pads form a grid of capacitors, two conductive plates separated by the dielectric plastic overlay. As the comb slides over the copper pattern, the capacitance between the plates changes. If the patterns are engraved precisely, even very small changes in capacitance can be detected by an analog interface (such as an RC timer or oscillator)
This means that if the dielectric changes it can mess up the readings. For this reason, digital calipers can give jumpy readings if they are dirty or wet.
Safe and sound
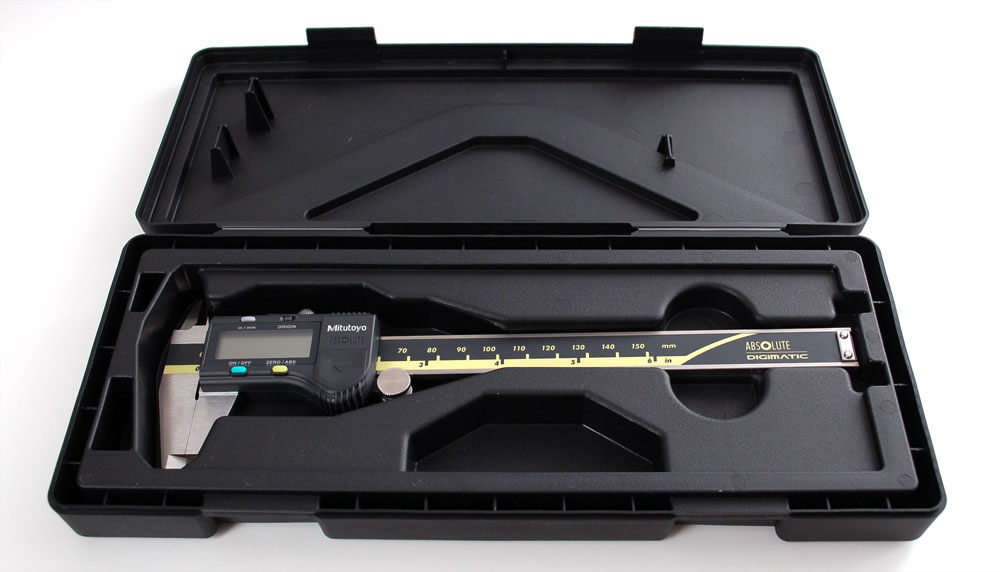
Keep your calipers happy and safe in their box. Even though digital calipers are in many ways more durable than mechanical/dial types, especially with respect to shock, when traveling or storing, keep 'em in the case!
Battery life and replacement
Digital calipers do require a battery (there are solar ones as well, with an internal backup battery) but good calipers rarely need to have the battery replaced. The pair we have is used many times a day and often isn't even turned off for a few days but has been running without issue for over 5 years. We do suggest turning them off when not in use but many people don't even bother since the battery drain is so low.
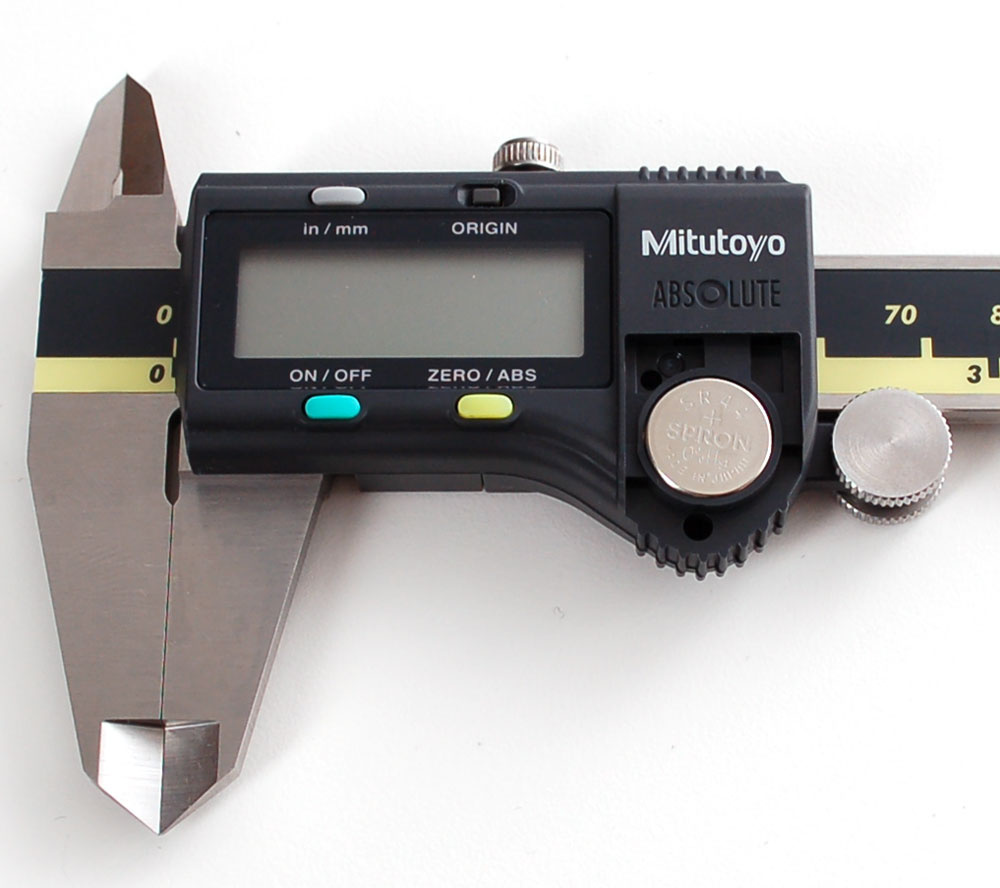
To replace the battery, just snap of the top cover, the battery is LR44/SR44 size 1.5V button battery, available in any hardware or grocery store. The Silver Oxide SR44 costs more, but will last longer.
Origin set
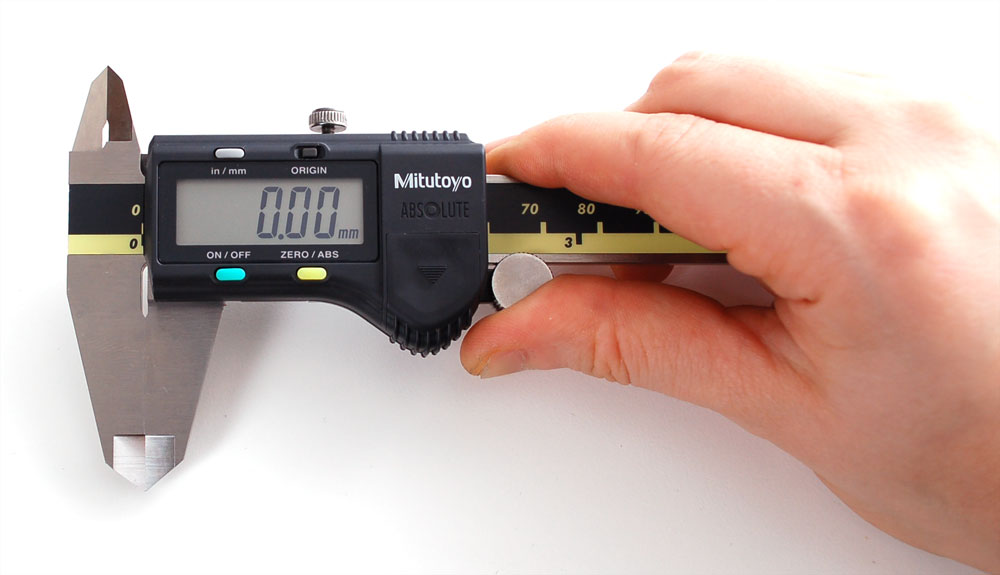
Before using your calipers, check that the origin is correct, clean the blades with a cloth to make sure there's no dust or dirt that would give the wrong measurement and close the jaws. You should read 0.0mm, if not, check that they're clean and if so, press the origin button. We've never had to do this since they are pre-origin'd at the factory but hey, you never know.
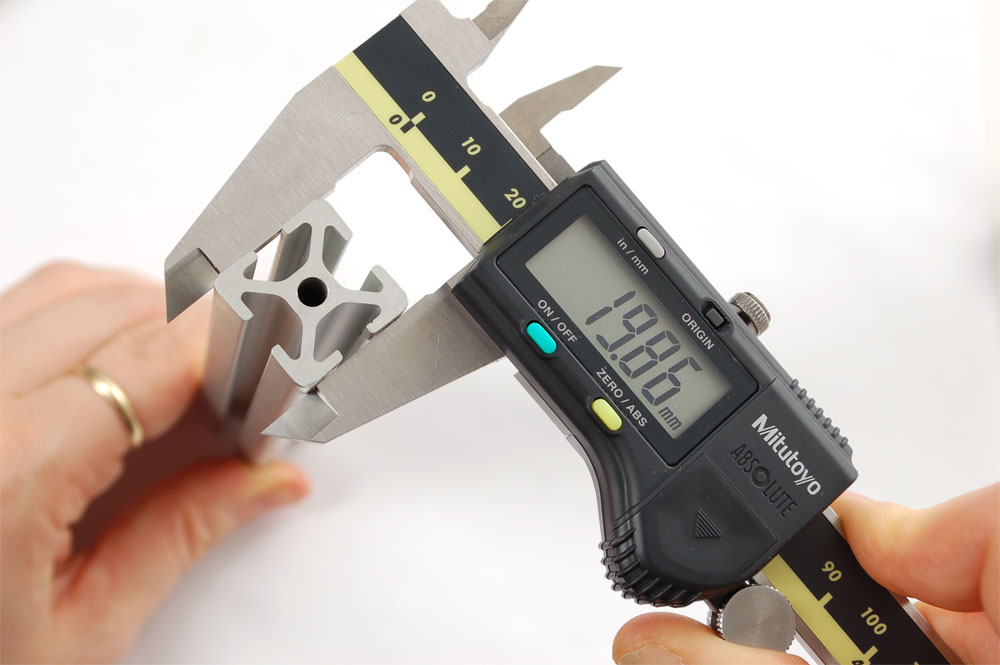
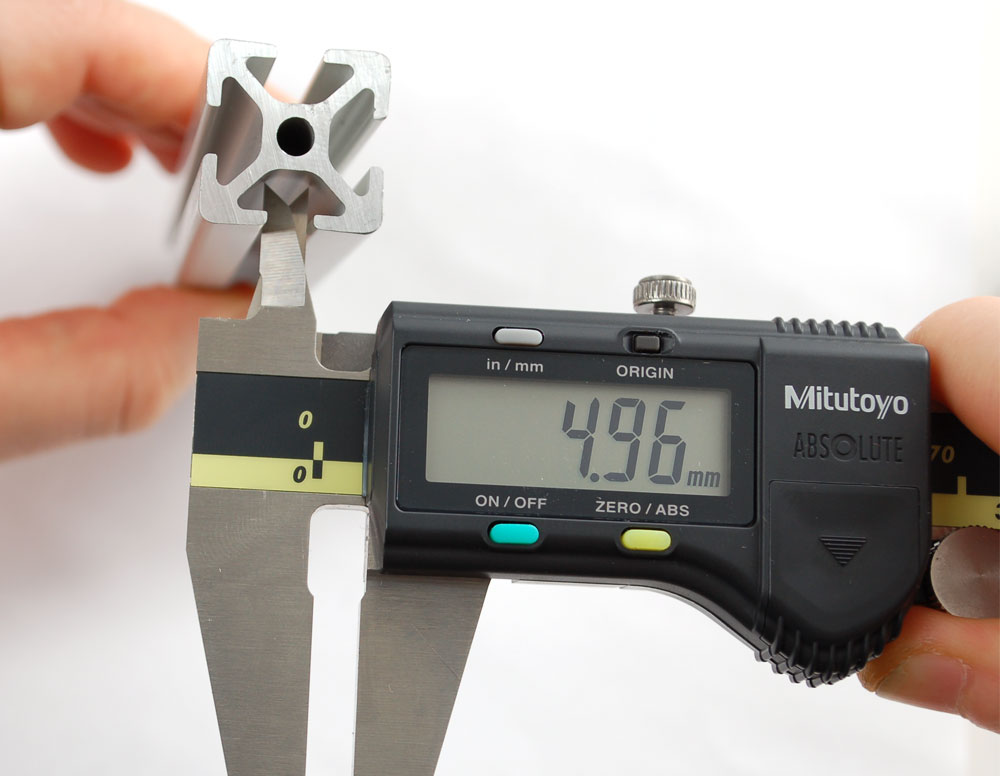
Basic measurements - inside, outside and depth measurements
For the three basic measurements, we'll be measuring a piece of 20mm extruded aluminum framing.
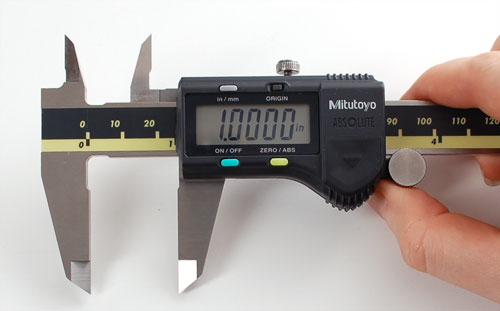
The first measurement is using the 'outer' jaws. Use the flat part if possible, to avoid any skewing. Use the thumb-wheel to get a good tight grip on the material. You'll not3 it's not exactly 20mm, that's from the manufacturing tolerances, not the calipers.
The inner jaws are used to make measurements of slots and holes. These are a little tougher, make sure you're holding them so you are not getting an 'angled' measurement that is larger than it should be. I usually take a few measurements and also 'wiggle' the calipers to make sure they are measuring the minimum distance.
The last basic measurement is depth, often used for drilled holes. This measurement uses the gauge at the end of the calipers. You'll want to practice how to hold the calipers to push the tapered end piece down while also keeping the tail flat against the work, its a little counter intuitive!

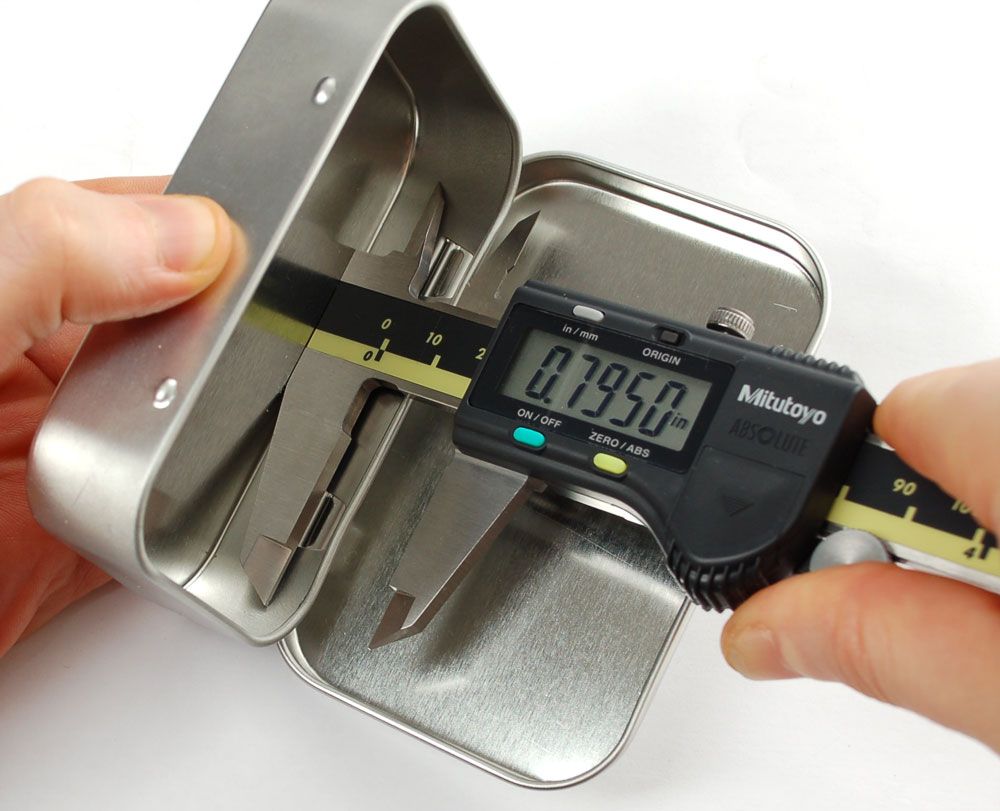
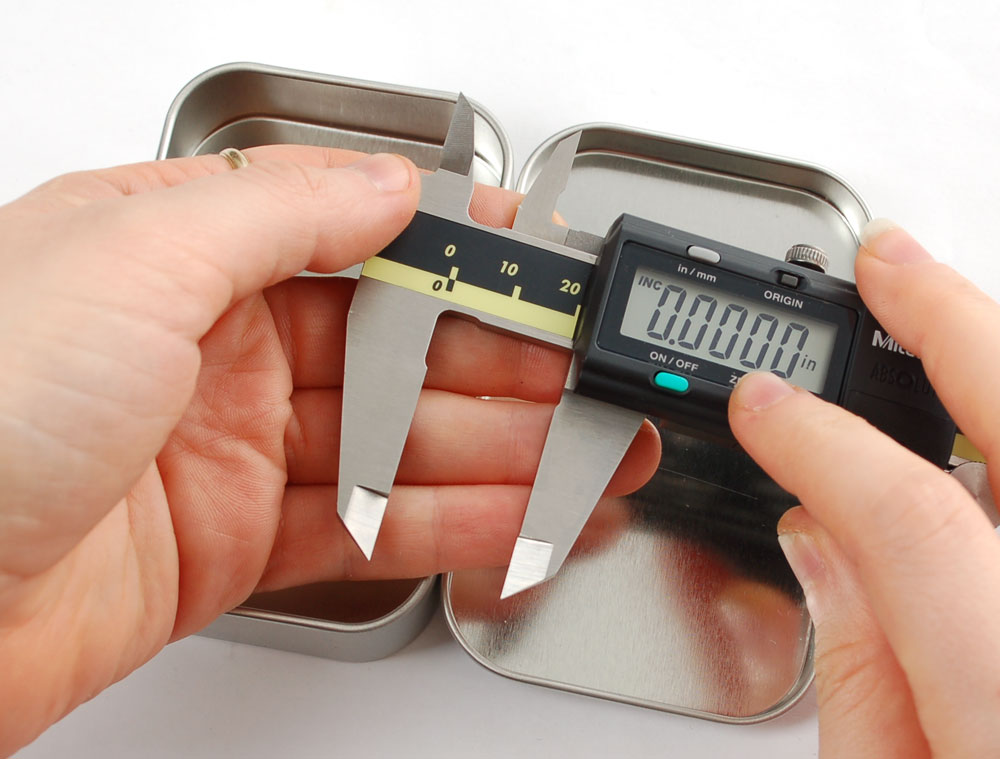
Step & relative measurement
Say we have a mint tin that we're measuring. We want to know the thickness of the metal, but because of the rolled edges, there's no easy way for us get a good measurement with the outer-pincers. However, we can use two measurements and subtract them! This is what digital calipers are good at.
Step measurements are taken by pressing the 'head' against the bottom of the tin and then lining up the offset movable side so that it presses against the top of the edge
Now zero out the measurement
And measure the overall thickness. The difference is the thickness of the bottom metal
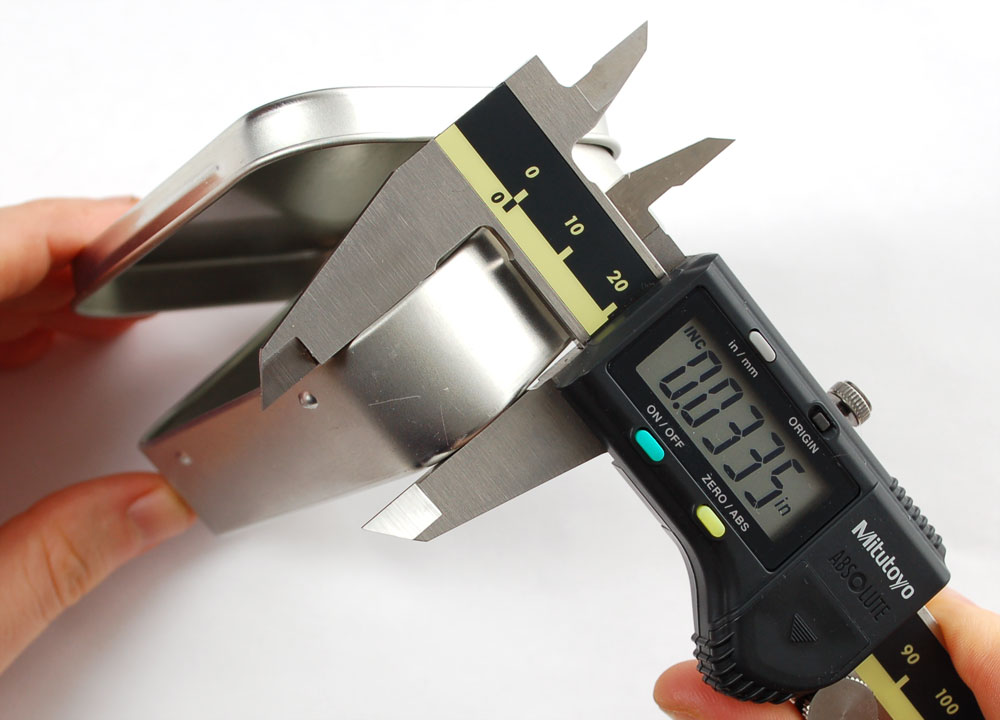
This measurement came out to 33.5 mils. The closest standard sheet gauge to 0.0335 is 20 gauge. Variations in the metal thickness may be due to additional thickness from the plating process or the rounded edges interfering with the depth measurement. Taking multiple measurements is always a good idea!
Measuring connector pitch
We use our calipers to verify component sizes, sometimes these numbers are in the datasheet but once in a while we have a part for which the datasheet is incomplete or we just want to verify. If you're measuring a dense connector, its a good idea to measure over a large number of pins and then average.
For example, on this 37-pin FPC (flex circuit board) I'm measuring between the center points (as far as I can manage) of the two outer pins.
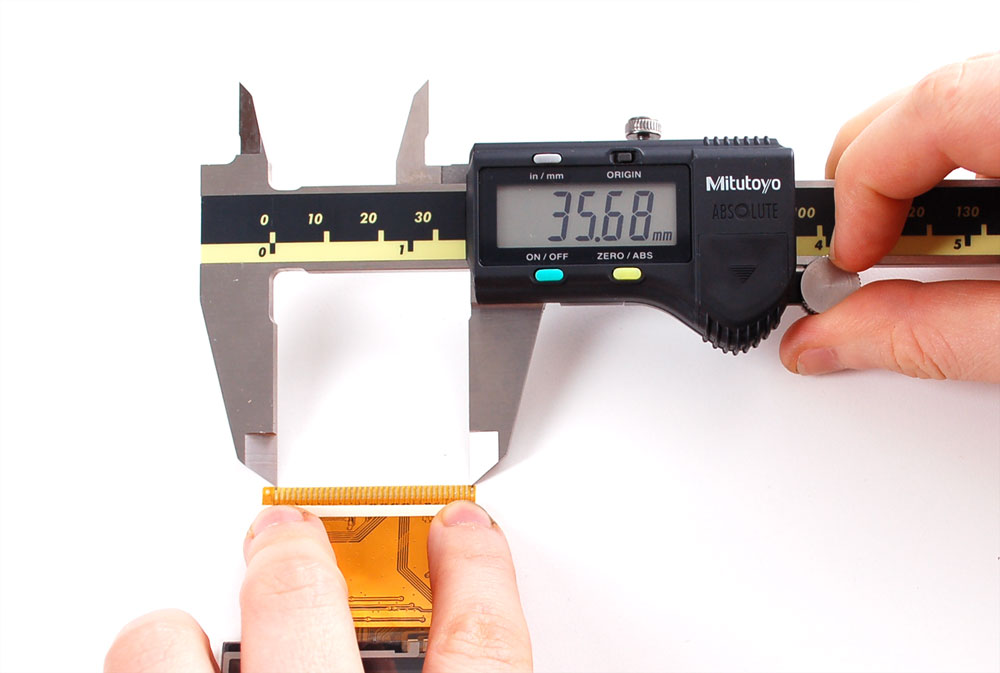
Remember that for a N pin connector, there are N-1 'gaps' (a common-enough confusion that it has its own name, the fencepost-error) so divide 35.68mm by 36 = 0.99mm. Since we're eyeballing the center points of the connector, this should be rounded up to a 1mm pitch. Sometimes the number should be rounded up/down in imperial so if it seems off, check other units.
Measuring pin-to-pin distance
A nice trick you can do with digital calipers is zero'ing out the origin. For example, lets say we have a connector with pins, we want to measure the pin distance. First measure the pin thickness
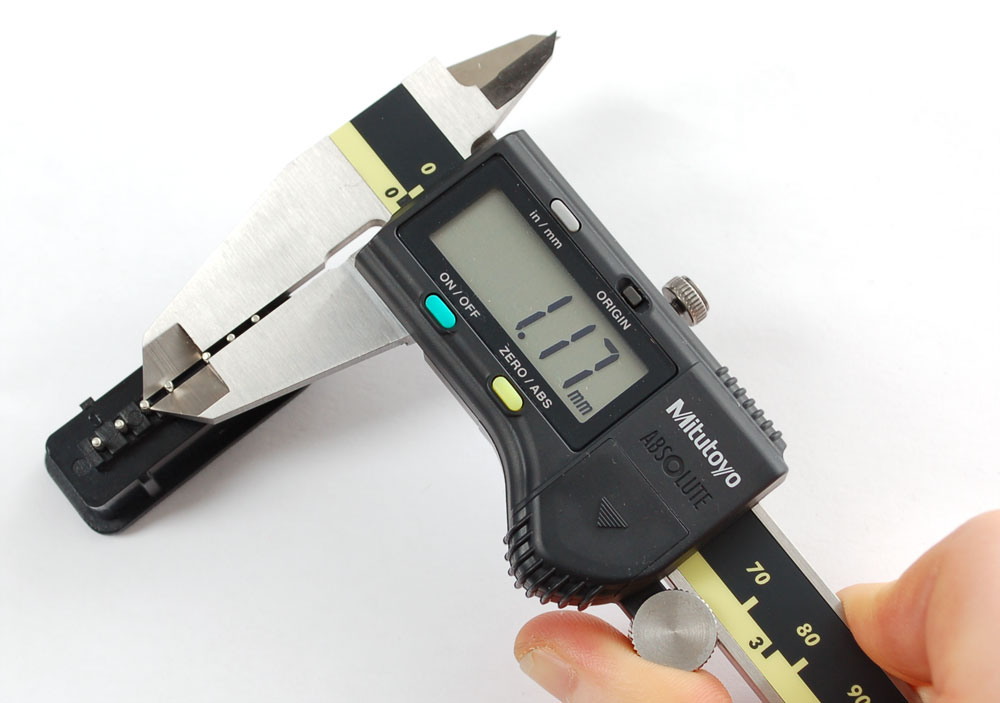
Zero it out
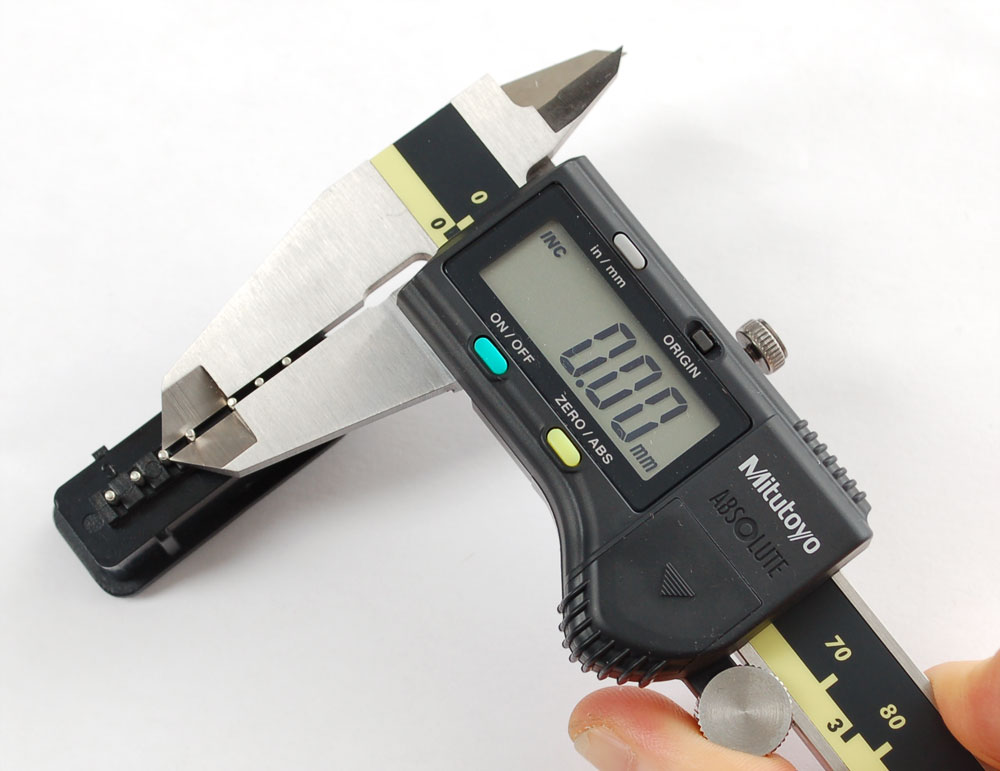
Now you can measure on the outer edges of the pins and it will automatically subtract one pin thickness.

In this case there are 4 pins, so divide 11.92mm by 3 to get 3.97mm, which we'll round up to 4mm since we know its a metric part.
