tutorials:products:bonebox
Table of Contents
Bone Box Assembly Instructions
Pack up your Beagle Bone in this lovely clear plastic case. We designed this case to be the ideal enclosure, with plenty of elegant details to make it useful to you!
There's plenty of space inside to add on one of our Beagle Bone Proto Capes with components or connectors soldered on. Fits any Beagle Bone version out there - but not BeagleBoards!
Parts List
The kit includes the following items:
- Six (6) laser-cut acrylic pieces.
- Eight (8) 1/2" #4-40 machine screws.
- Eight (8) #4-40 steel nuts.
- Four (4) 3/16" nylon spacers.

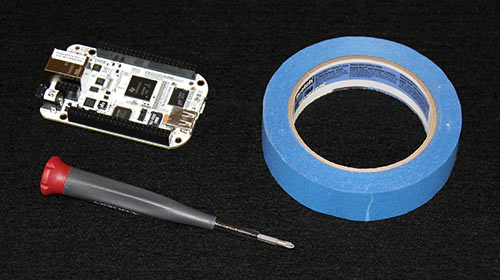
Not included with the kit, you will also need:
- BeagleBone single board computer.
- Small Phillips screwdriver.
- Optional: tape.
Preparation
- Peel the backing paper off the acrylic parts.
- Remove Proto Cape, if installed.
- Remove microSD card.
Assembly
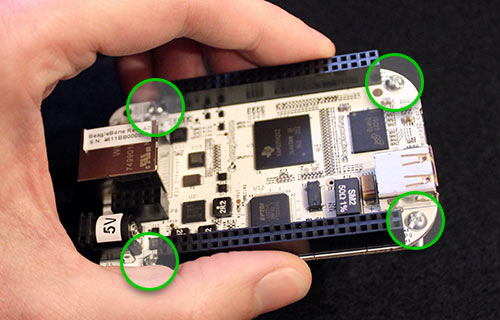
1: Attach BeagleBone to Base Plate
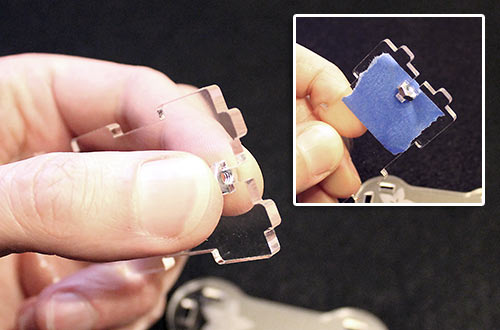
- Insert 4 screws into the BeagleBone's corner mounting holes:
- Flip the board over, using fingers and thumb to hold the screws in place. If this is a dexterity challenge, the screws can also be held with tape:
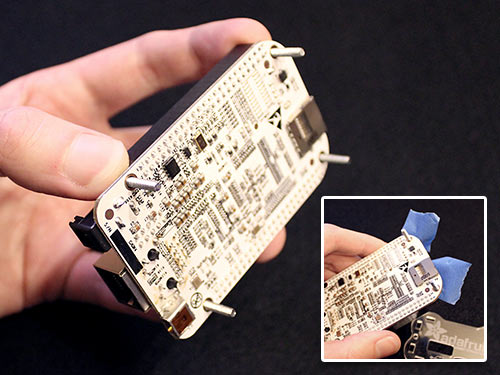
- Slide a nylon spacer over each of the four screws. VERY IMPORTANT: Use ONLY the standoffs included with the kit. DO NOT use wider standoffs in their place, and SUPER ESPECIALLY DO NOT use nuts as a makeshift standoff. The component clearances on the BeagleBone are very close, and using the wrong standoffs could result in components being sheared off the board!
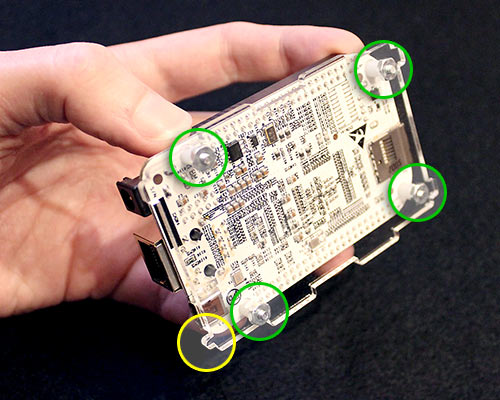
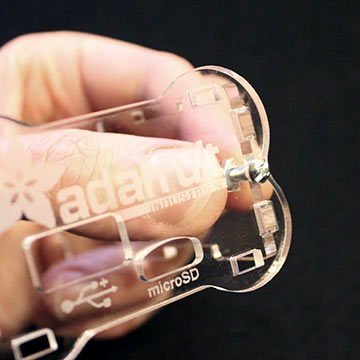
- Slide the base plate over the screws, coming to rest on the spacers. There's a specific orientation for the base plate: one of the four alignment studs is smaller than the others — this should be positioned closest to the USB client port.
- Install four nuts and gently tighten each screw.
- You can now reinstall the proto cape, if using one.
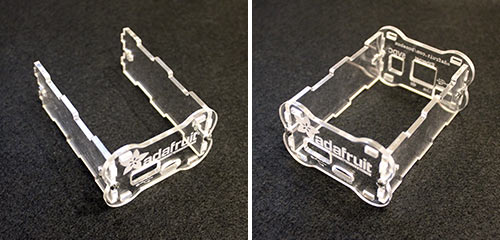
2: Assemble Case Sides
- The case is held together using "T-slot" construction. Holding one of the side pieces, insert a nut into the cross part of the "T" (tape can again provide a temporary hold if needed).
- Position one of the end pieces over the alignment studs, then insert a screw through the corresponding hole for the nut. Tighten with gentle finger pressure for now.
- Install the second side piece using the same technique, then repeat with the opposite end face plate, making sure the "up" orientation is the same. It's okay if the box isn't perfectly square at this stage.
3: Install Board in Case
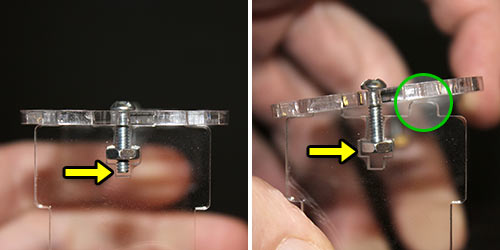
- Loosen, but do not completely remove, the two screws on the front face plate. The tip of the screw should be flush with the face of the nut. The face plate can then pivot with just enough clearance for the alignment studs:
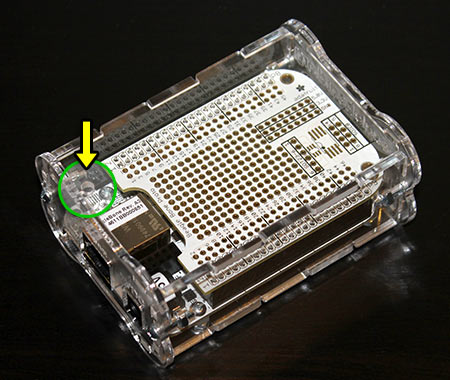
- Insert the BeagleBone base plate into the case by inserting the alignment studs into the back face, then pivot the board into place and press the front face flush.
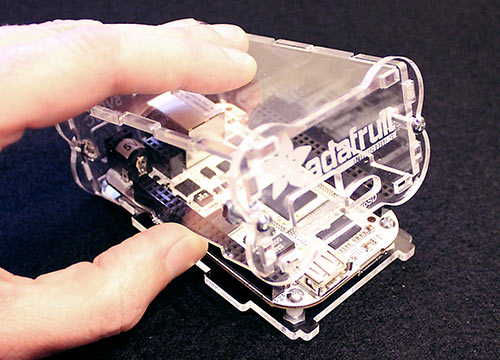
- Now tip the face plate in the opposite direction and install the case top in a similar fashion. Align the hole in the top face with the reset button on the BeagleBone (once sealed, this is accessed with a paper clip or small screwdriver). Or you can choose to keep the top cover off, if you'll need frequent access to the BeagleBone or cape.
- Press the front face flush again and tighten all the screws. Acrylic is brittle, so don't crank these down too hard – finger pressure plus 1/8 turn is sufficient. Insert the microSD card (make sure it goes into the card slot, NOT loose in the case!). Bingo…you're done!
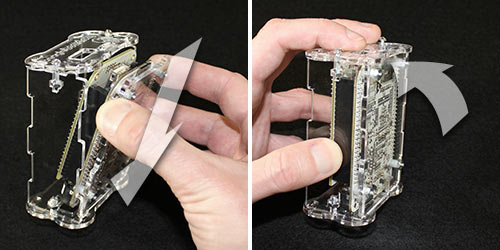
Access
To access the board or cape later, it's not necessary to rewind this entire process — most of the parts can be left in place! Just loosen the front case screws 1/8", tip the front face back and pivot the case upward:
/home/ladyada/public_html/wiki/data/pages/tutorials/products/bonebox.txt · Last modified: 2016/01/28 18:05 (external edit)
Except where otherwise noted, content on this wiki is licensed under the following license: CC Attribution-Share Alike 4.0 International
