Since the MIDIsense hardware speaks MIDI, it is compatible with any MIDI software such as Max/MSP, Ableton Live, Cubase, MIDI-OX, etc. As well as any musical instrument that takes MIDI input (keyboards, synthesizers...).
However, before the hardware is used, it should be configured and calibrated to get the best performace. To do so, the MIDIsense software is used. In theory, any software that can upload custom Sysex messages can be used, but the MIDIsense software has an optimized interface specifically for this purpose.
The MIDIsense software is written in C++ and is available as precompiled binaries for Mac OS X or Windows from the download page. Linux is not supported right now, although the source code is available and can be ported (and will be once I find some free time!)
Step 1: Grab the proper files from the Download page for your computer
Note that you only need to run the software when you first configure & calibrate the board/sensors. Once you've done that, you can use any MIDI-compatible software or hardware to interface with the sensors.
In order for your computer to 'talk' to MIDIsense, you will need a MIDI interface. Sometimes audio cards have a MIDI interface onboard but this is rare and complex. In general, I suggest that users purchase a USB/MIDI interface device.
The one I use with good results is the MAudio USB Uno for about $40 which is convenient because it comes with the MIDI cables already attached. No matter what you use (USB/SCSI/PCMCIA/etc), as long as the computer recognizes it, you're probably fine.
Install the drivers and plug in your MIDI interface. You should also verify that it installed properly and that the computer recognizes the interface. Note that you will get much better performance if you install the drivers from the manufacturer, your OS can talk to it as a generic USB/MIDI device but the bandwidth can be constrained.
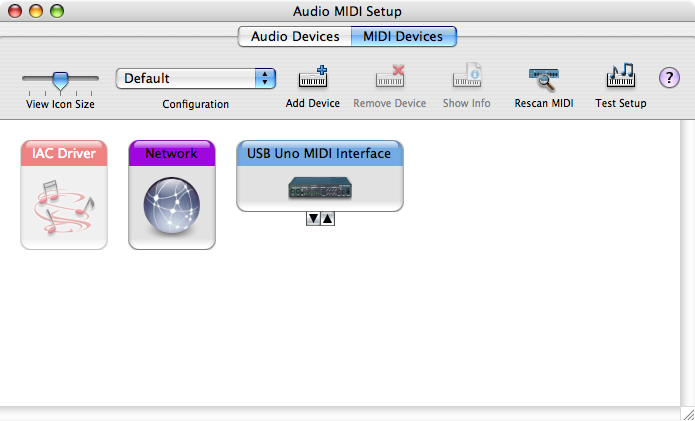
Check to make sure you see the MIDI devices: in Mac OS X, run "Audio MIDI Setup":
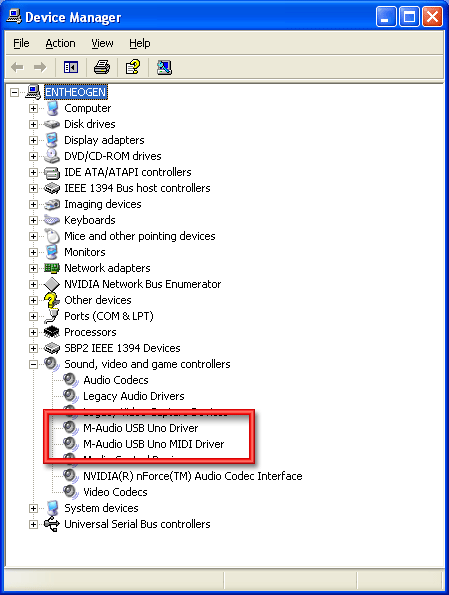
Under Windows, look for the device in your Device Manager:
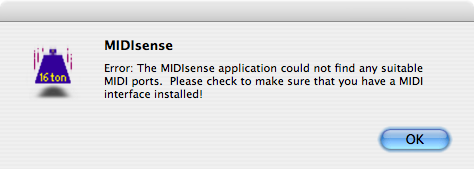
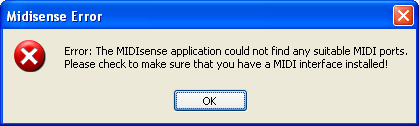
OK, once you've gotten your MIDI interface up and running try running MIDIsense software by double-clicking the application. If the subsystem can't locate any MIDI port, you'll get this window:
Otherwise, the software will start as normal.
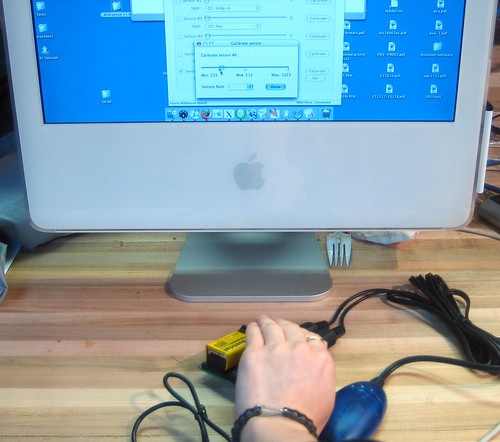
Now make sure you have your sensor connected to the port of your choosing (we'll use Sensor #6 here) and have a matching resistor soldered into the correct location (R106 matches sensor #6), instructions and suggestions are available on the Sensor page. In this example, we'll use the photocell sensor that comes with the kit.
 |
OK here is my MIDIsense set-up. the UNO USB/MIDI interface is connected up, and I've started up the MIDIsense software and connected to the board. The photocell is in sensor location #6 and R106 is a 10K resistor. I haven't soldered it in, because I'm verifying that its the right value: unfortunately, it really depends on how much ambient light is around. It seems pretty good in this case, however. |
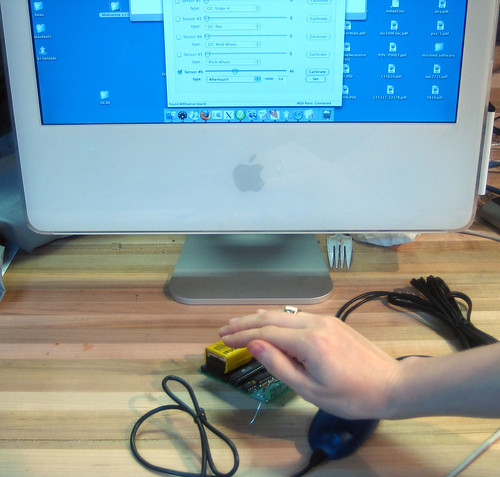 |
Shade the sensor with your hand, note that the MIDI slider moves to the left (lower values). However, in this case I cant get it to go lower than 1/3. Since I want the full range of MIDI values, I'll calibrate it |
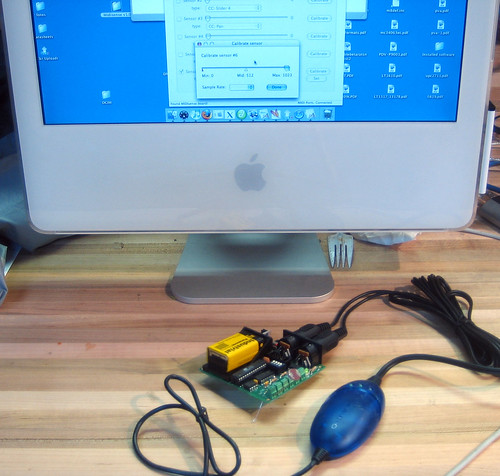 |
Click on "Calibrate" to pop up the calibratiton window |
 |
Now shade the sensor again, note that the slider is, again, at about 1/3. |
 |
Set the calibrated minimum by dragging the red tab from the left to just about where the slider goes to. Then click "Done" |
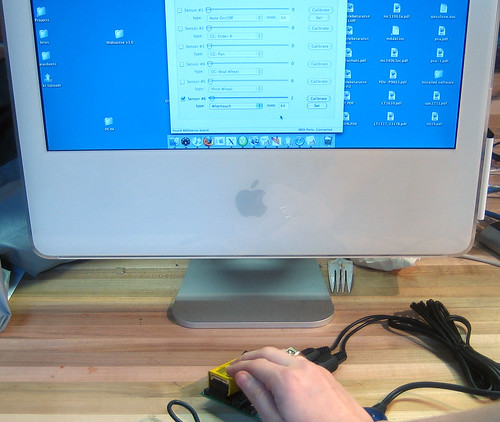 |
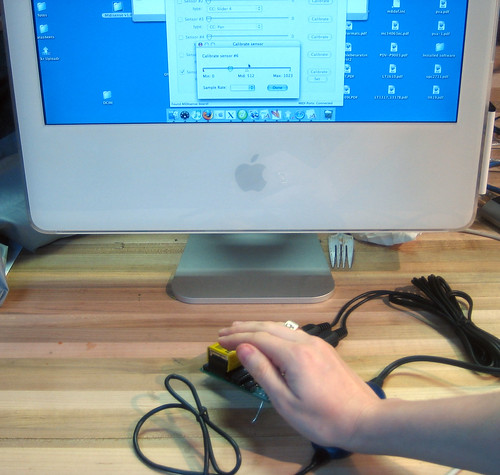
Now note that when we shade the sensor, the slider goes all the way to the left: we're using the full range available. |