OK now that you have installed your development environment and gotten your programmer or cable all set, its time to start talking to your kit.
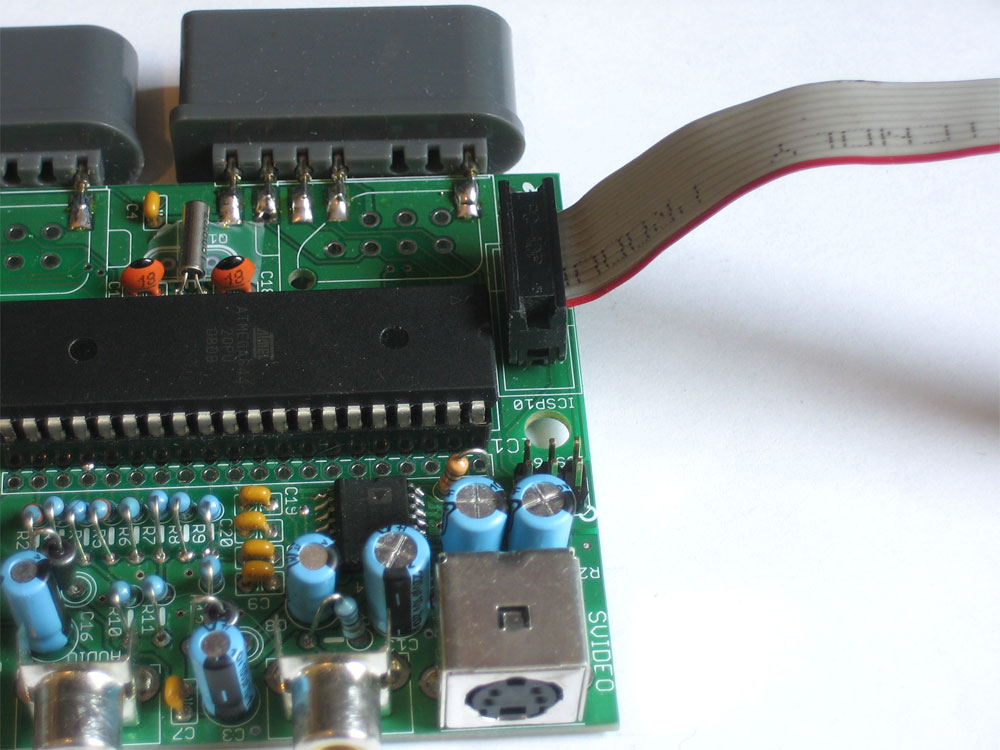
Plug in your AVR programmer into the 6 or 10-pin ICSP ports
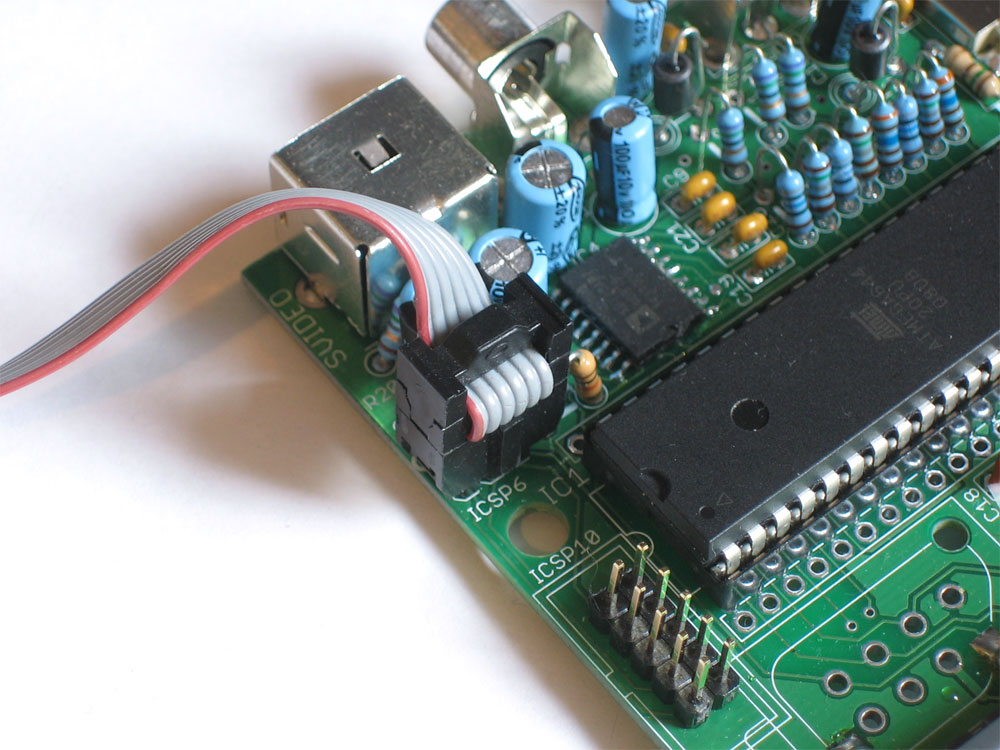
Or, plug in the FTDI cable so that the green wire end is next to the grn silkscreen and the black wire end is next to the blk silkscreen
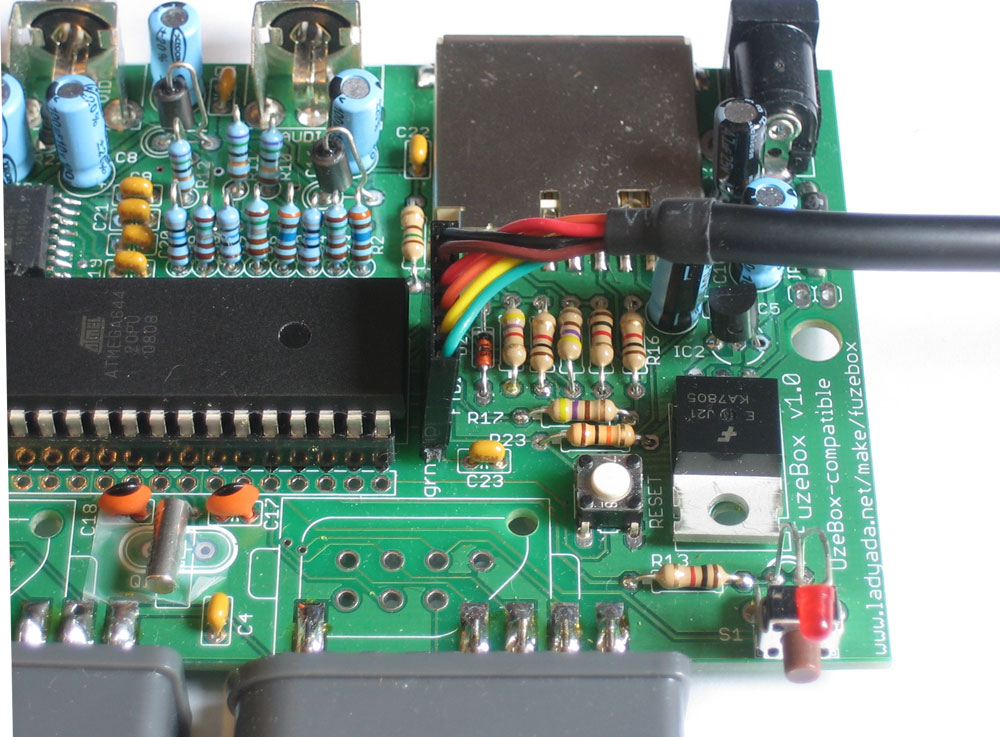
Make sure the Fuzebox is powered!
If you're using an FTDI cable, it will automatically power the kit from your computer's USB port.
Otherwise, use a DC power adapter. Make sure you see the indicator LED blink, showing that the bootloader has started. (If you reprogrammed the kit, of course, it wont blink anymore)
Open up a terminal/command line window and type in avrdude, which is the uploading program we'll be using to talk to the AVR in the Fuzebox.
You should get something like this:
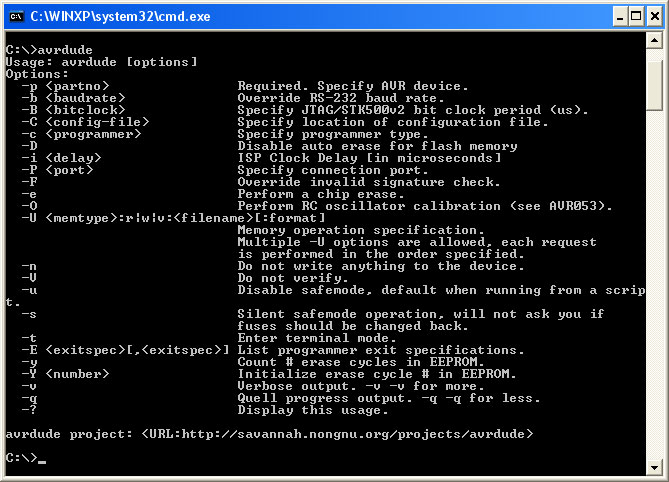
Indicating that AVRdude is installed properly. Now we will make sure that we can talk to the Fuzebox. Go back and figure out what COM/serial port the FTDI cable is named.
Now type in avrdude -p m644 -c stk500v1 -P COM4 (substitute COM4 with /dev/ttyUSB0 or /dev/cu.USBserial-ASDF1234 or whatever the name of the FTDI cable is). But don't hit return!
If you're using a usbtinyisp progammer, the command will be avrdude -p m644 -c stk500v1 and don't forget that you should jumper the 1.5K resistors (see last step of usbtiny instructions)
If you're using a DASA programmer the command will be avrdude -p m644 -c dasa -P COM1 (or whatever serial port that the programmer is connected to)
If you're using some other programmer, check the documentation for how to get AVRdude to talk to it. From now on I'll assume you're using the FTDI cable so be sure to change the commands if necessary
If you have a lot of FTDI-chip devices that have been plugged in to your computer, like adapters, Arduino, cables, etc. the COM port numbering under windows might be as high as COM10! In this case you have to use the command notation avrdude -p m644 -c stk500v1 -P \\.\COM10 to address the COM port. I have no real idea why this is and its annoying as heck but soon this will be all in a Makefile so bear with me.
Now, press the RESET button on the Fuzebox and as fast as you can, hit return so that the command is sent less than 3 seconds after the Fuzebox resets.
You should get something like this:
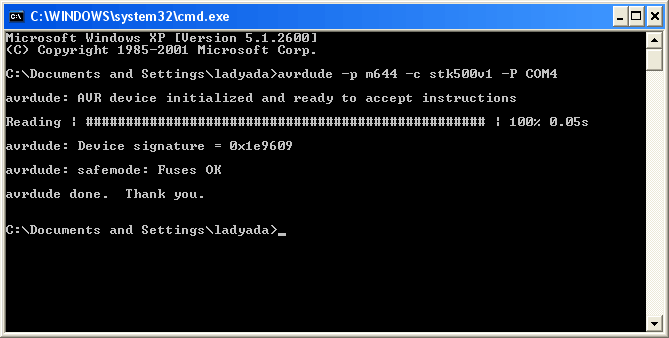
Which indicates that the computer program successfully talked to the AVR through the FTDI cable. If you couldn't connect, try the following:
- Make sure you hit return within a few seconds after the RESET button
- Check that the Fuzebox is powered, and you see the blinking indicator for the bootloader
- Verify you have the right COM/serial port name. If you have other devices plugged in, remove them for now just to keep confusion down
Now its time to try auto-reset. Auto-reset is a trick that allows us to skip the annoying RESET-button-press-timeout hassle. Instead, the cable will automatically reset the Fuzebox right before communicating. If you're running windows, make sure to perform the Cable Hacks in the previous section so that RTS will be inverted & RTS will be set on close.
Now try running avrdude again, this time don't press the RESET button. You may have to try it more than once, but if all is good then you should see the Fuzebox reset and avrdude talk successfully to the chip.
Once you've gotten the first test working, celebrate a little and then maybe spend a few minutes reading a short tutorial on avrdude, it will come in handy!
There's time for theory later. Lets get going with uploading your first game. First off, download the spritedemo-v2.hex file here. Save it to your My Documents folder (for windows) or home dir (for linux/mac). Open it up with a text editor (like WordPad, TextEdit, etc) and make sure its full of lines that look like this:
:100000000C9471220C949D220C949D220C949D22A0
Those lines are Intel Hex format for microcontroller binaries, written in hexidecimal. OK, now open up your terminal (again, if you closed) and change the directory (cd) to your home directory or My Documents dir. Then type in ls *.hex which will list all the .hex files, and make sure you see spritedemo-v2.hex. If not, move the hex file to the directory you are in! Then, finally, tell avrdude to send the sprite demo over to the Fuzebox:
avrdude -p m644 -c stk500v1 -P COM4 -U flash:w:spritedemo-v2.hex
The -p m644 means we are expecting to connect to an ATmega644 so verify that, the -c stk500v1 says we are going to communicate using the STK500 v1.0 protocol, which is how the bootloader talks to the computer, the "-P COM4" indicates which serial/COM port we are using to talk to the AVR and finally -U flash:w:spritedemo-v2.hex means we are going to Upload/talk to the Flash, writing the spritedemo-v2.hex file.
You should see avrdude chug through the file, sending each line at a time and then going back and verifying to make sure everything was written correctly.
![]()
![]()
Finally, the Fuzebox will auto-reset and start the Sprite Demo. Congrats, you uploaded your first game!
![]()
Disable the bootloader if you arent using it!
If you are planning to never use the bootloader because you have an AVR programmer, make sure to disable the bootloader fuse! You can do that by setting the high fuse to 0xDD, using avrdude run the command avrdude -p atmega644 -c usbtiny -P usb -u -U hfuse:w:0xDD:m (or whatever your programmer/port is)