Whats the point of a game console if you can't upload new games? In this section we will discuss how games are stored and how to get ready to load new games into your Fuzebox
Most consoles store games on cartridges, CDROMs, diskettes, etc. The Fuzebox is a lot simpler than that, it stores games in the internal flash memory of the microcontroller chip. The microcontroller has 64Kb of 'semi-permanent' flash memory: it isn't erased when the power is turned off but its easy to overwrite it. This means that it can only play one game at a time, and to play a different game, the console must be reprogrammed. The flash can be reprogrammed more than 10,000 without any problems, so there's no risk of it getting worn-out.
The first step to loading a new game is to compile it into a binary, much like computer programs (.exe's or App's). One of the nice things about AVR microcontrollers is that the compiler is free/open source. It's also standardized, so there's little risk of games suddenly not working, or the compiler being discontinued.
Some games are available pre-compiled for the Fuzebox, which saves you a step. But you'll still needs to upload the game to the chip.There are many different programs available but the most popular ones are AVRstudio (which is the official version from Atmel, for windows) and AVRDUDE (which is the open source version that runs on all operating systems. Since I like to being inclusive, I'll assume that everyone will be using the open source tools. That way the instructions will make sense for the most number of people.
Unless you've already done some microcontroller hacking, you should install the AVR development system on your computer. For windows, I suggest both AVRStudio and WinAVR (see here for my tutorial). For Mac, AVRMacPack seems to be the best choice (see here for my tutorial). For linux, you'll have to do some package installing, which depends a bit on your distro: I suggest googling for the best way for your distro, or if you are willing to do it 'from scratch', my tutorial will take you through step-by-step.
Once you can open up a terminal/commandline and type in avr-gcc and make and the response isnt "isn't found" or "isn't recognized" then you're ready to go to the next step which is picking your programmer
There are two ways to program the console. One is to reprogram the entire chip using an AVR programmer. The other is to use a bootloader that is pre-programmed onto the chip that allows the chip to re-program itself. An AVR programmer is more powerful: you can really mess with anything on the chip and the entire 64K of memory is available. Using the bootloader is safer: there's no way to mess with the fuse settings (which could brick the chip) but you only get 62K of memory since 2K is used by the bootloader.
Note that to program an AVR you need an AVR programmer, but to upload using the bootloader you need a computer-serial connection (such as an FTDI cable). Unfortunately, they are not the same device so unless you have both, you should pick one to start with. If you're not a microcontroller wiz, I suggest going with the bootloader method. Its as fast (or faster), allows you to debug as well, and theres virtually no way to damage/brick the chip by messing with the fuses. If you're familiar with microcontroller programming, and you have a programmer, then feel free to go that direction.
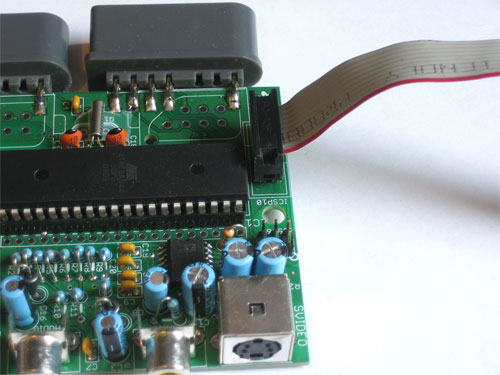
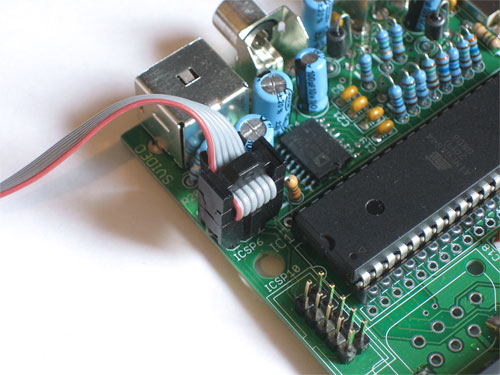
Pretty much any kind of AVR programmer works just fine. There's a selection in the Adafruit shop and there literally dozens of designs out there that you can build or buy. The Fuzebox has plugs for both 6-pin and 10-pin AVR programmer cables. Simply line up pin 1 as shown:
Don't forget: the VCC line on the ICSP ports carries 5V to the programmer.
You may also need to modify the game Makefiles to adjust for your programmer
If you're doing this, make sure to disable the bootloader fuse! You can do that by setting the high fuse to 0xDD, using avrdude run the command avrdude -p atmega644 -c usbtiny -P usb -u -U hfuse:w:0xDD:m (or whatever your programmer/port is)
If you bought a Fuzebox kit, the microcontroller will come preprogrammed with a bootloader. The bootloader can be overwritten with a AVR programmer, but I don't suggest it. Instead, you can use an FTDI cable to easily connect to the Fuzebox and upload & debug games. You can verify that you have the bootloader by pressing the RESET button, the indicator LED should blink 3 times.
Using the FTDI cable requires installing the driver. This driver makes the cable appear like a COM port (or under mac/linux a serial port). Download the driver and install it. For Linux/Unixes the FTDI driver is already installed.
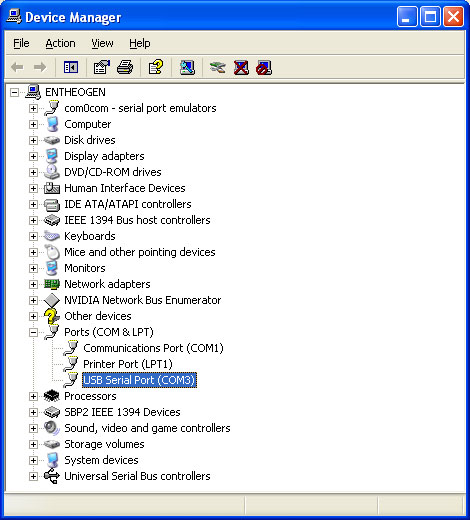
Then look at the Device Manager (Windows)
Or under Mac, in the Terminal window, type in ls /dev/cu.* which should give the following responses
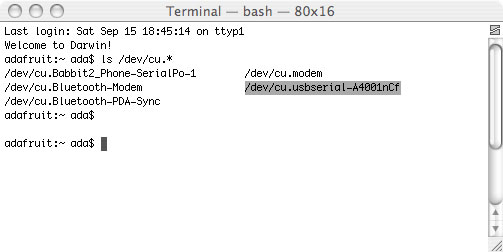
Make sure you see a line with the text /dev/cu.usbserial-xxxxx where the xxx's can be anything. This indicates that the driver installed properly and that the FTDI cable was found.
For Linux/Unix type ls /dev/ttyUSB* into a terminal window, you should see a device file called something like ttyUSB0
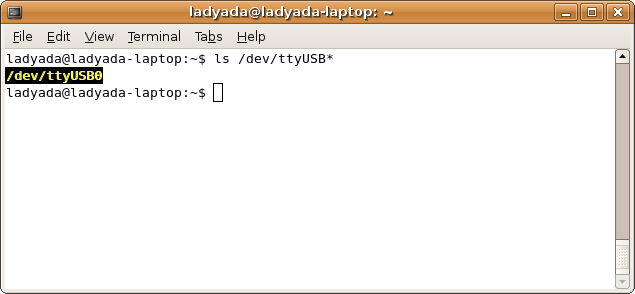
Depending on your Linux distro, it may be /dev/tty/USB0 or /dev/tty.USB etc.
If you can't seem to find it, use dmesg | tail right after plugging in the Arduino and look for hints on where it may put the device file. For example here is says Serial Device converter now attached to ttyUSB0
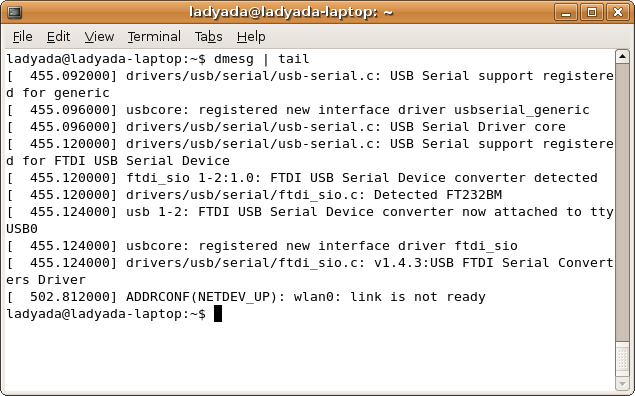
If you see something about 'brltty' (which is, annoyingly enough, installed by default on many Linux distros), go here to read about removing it
Before going all out and trying to upload games, there's two small hacks that I suggest doing. They will make uploading much easier. The first one requires a windows machine. If you don't have access to a windows machine, then don't worry, its not an essential hack. Download FTDI's MProg utility and start it up. I suggest unplugging any other FTDI-based devices so you don't accidentally reconfigure them too!
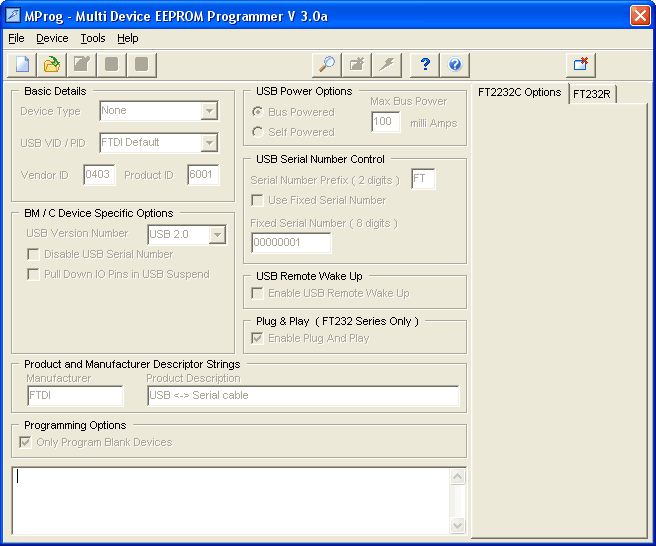
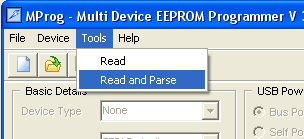
Select Read and Parsefrom the menu
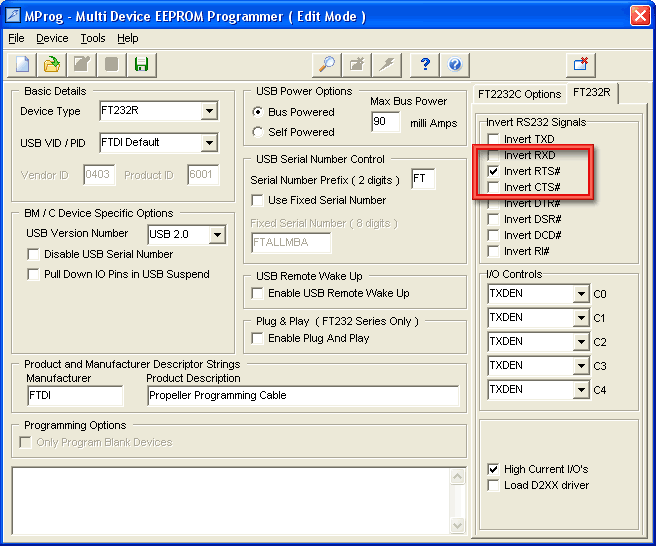
Now click the checkbox that is labeled Invert RTS#, don't change anything else
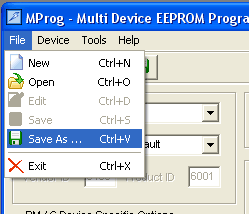
Now oddly, you need to save the configuration. Select Save As...
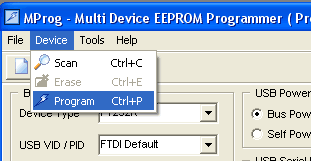
Then select Program
Now unplug the cable and plug it back in - the device will be re-recognized.
This is another hack, its not necessary under Linux or MacOS but along with the previous mod it will allow the cable to automatically reset the Fuzebox when a program is downloaded. In the Device Manager, select the USB COM port that corresponds with the FTDI cable

Then right click and select Properties
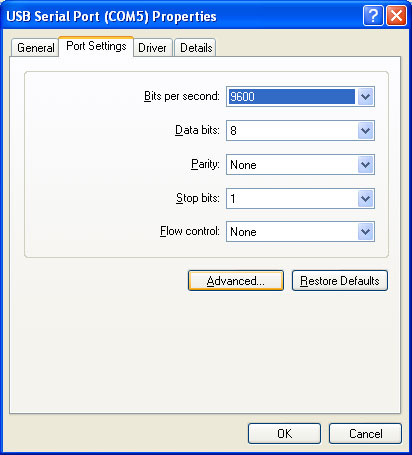
Click on the Port Settings tab, and click on Advanced...
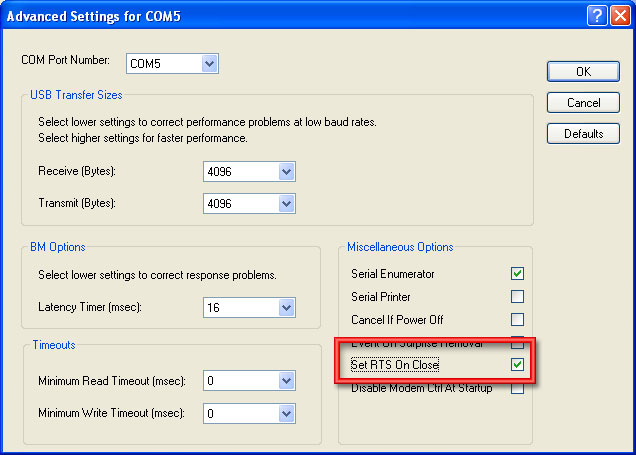
Make sure Set RTS On Close is selected. Then click OK
