Even after soldering all the parts, there is some 'fly wiring' that is required to get the shield to do what you want. The reason it was designed that way is so that people with unique requirements could easily customize how they want the shield. However, we will cover the most common cases.
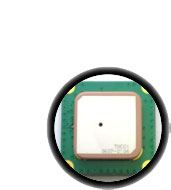
There are two parts of the shield: the GPS module interface and the SD card interface. The SD card must be connected to the Arduino digital pins 13, 12, 11, and 10 for it to work and so those pins are 'taken'. The GPS module interface does not have to be connected to any -particular- pin so they are left free for you to jumper with common wire.. The GPS module interface is as follows:
- TX - this is the transmit pin, data that comes from the GPS module with location data
- RX - this is the receive pin, data that goes to the GPS module to configure it
- PWR - this pin is connected to a transistor that controls power to the GPS. When this pin is set to LOW the GPS module turns on and when the pin is set to HIGH the GPS turns off.
- L1 and L2 - these are the two red/green LEDs on the shield which can be used for indicating whether data is being logged, if there is a GPS location lock, etc.
- PPS - this is the GPS syncronized pulse clock, it pulses exactly once a second.
- CD - this is actually part of the SD card interface, its a card detect switch and is connected to ground when a card is in the holder. Its not really necessary but is included in case you'd like to use it
- WP - this is also part of the SD card interface, its a write protect switch and is connected to ground when the little latch on the side of the SD card is set to 'lock'. Its not really necessary but is included in case you'd like to use it
The only really important pins are PWR, TX and RX. Some modules work even when RX is not connected to anything (floating) but many act kind of strange so I suggest always connecting it up.
Cut three pieces of wire, two about 1" long and one 2" long.
Solder the two shorter ones to RX and TX. Solder the longer one to PWR.

Now continue to the next step, which is testing the GPS module by connecting it to your computer